Pin of the Week: No Mess Monster Finger Painting!

Wednesday, October 28, 2015
The countdown to Halloween is on! I am trying to jam pack as many spooky therapy activities and craftivities into my therapy sessions as possible. The other day when I was perusing Pinterest, I came across this Mess Free Monster Painting activity by Toddler Approved. We have been on a monster kick at home lately so when I saw this I immediately pinned it with K in mind. But let's be honest, the real winner was where I saw "mess free" painting. Since it's mess free, it's a fun activity to do at home or at school.
Here's what you need:
-Large zip lock baggies (1 for each kid. I used gallon size)
-Card stock (I was out of card stock so I cut up some file folders)
-Paint
-Googly eyes
-Glue
-Painters tape if you want to be extra careful that the pain doesn't come out of the bag. Mine stayed in with the zip lock, but you can never be too careful!

Here's what you do:
1. Draw an outline of a monster onto the card stock. If you are not confident in your monster drawing abilities, there is a template you can download here.
2. Cut out your drawing then put the monster outline inside the baggie. 
3. Squeeze some paint into the baggie. Be pretty generous with the paint, I ended up having to re-open the bag and add more half way through to make sure we could cover the whole monster.
4. Seal the baggie up (this is where the tape comes in if you are nervous with just the baggie)
5. Let your little one finger paint the monster!
One he/she is done creating their "monster-piece" carefully take the monster out of the bag and let it dry.
Once the monster is dry, add some googly eyes (you really can't have too many!) and that's a wrap. This is a lot of fun and really is mess free! I like pairing this activity with a Halloween story but you really could do this activity any time of the year!
If you missed my post on Monster Pudding Cups, you can check it out here. Who wouldn't love some pudding after crafting?!

Apraxia Walk 2015

Monday, October 26, 2015
Saturday was an amazing day in our community. Family members, friends, teachers, speech therapists (and SLP students!) all came out to support Childhood Apraxia of Speech. For any readers unfamiliar with Apraxia, Childhood apraxia of speech (CAS) is a motor speech disorder. Children with CAS have problems saying sounds, syllables, and words. This is not because of muscle weakness or paralysis. The brain has problems planning to move the body parts (e.g., lips, jaw, tongue) needed for speech. The child knows what he or she wants to say, but his/her brain has difficulty coordinating the muscle movements necessary to say those words (ASHA)
Rachel Anderson, the event coordinator, did a fabulous job organizing the walk. This day was truly was all about the kids. During the opening ceremony, children with CAS were awarded with medals to recognize their hard work. There was also a speech given by a little girl that described her journey with Apraxia. There was not a dry eye in the park by the time her speech was over. 
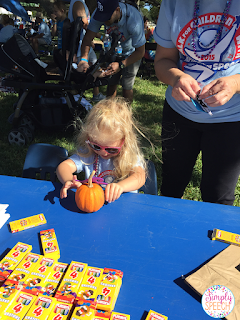
After the walk was over, it was time for some fun! There were so many fun activities for the kids from building with Home Depot, decorating pumpkins, arts and crafts, a reading corner with free books for the kids, a photo booth, a drum circle, and some awesome jams blasting so the kids could all enjoy a dance party!
 Kenzie had so much fun taking in all of the activities. Kameron snoozed in the stroller most of the day because it was so gorgeous out! I hope to continue to be able to be a part of these walks and events in the future. I want Kenzie &  Kameron to continue to be a part of these events and show their support to the community. 
 Rachel if you are reading this, your efforts in putting this event together was amazing. I know that the kids appreciated all that you did as well as their families. These children often feel excluded from their peers because of their speech disorder, but this day made them all feel like rockstars!! 

Pin of the Week: Monster Pudding!

Friday, October 23, 2015
This post contains Amazon Affiliate links for your convenience. 
Happy Friday! It's that time of year when pumpkins, ghosts, and goblins are invading your speech sessions! If you have been following my blog for a while, you know I just love a good thematic activity. One of my favorite books to read during the weeks leading up to Halloween is, Go Away, Big Green Monster by Ed Emberley.
This book is perfect if you are in a school that doesn't allow Halloween themed activities. It's a cute monster book that has lots of descriptive words. I actually plan on reading this book and making some monsters with Kenzie this weekend, so I will post some pictures after we do. 
After you read the story, how about you make some monster pudding?! This is a very simple but fun activity that will help your students work on their sequencing and following direction skills… plus it's yummy! 
Here is what you need…
1 package of vanilla Jello pudding 
2 cups of milk
green food coloring
chocolate sprinkles
9oz clear plastic cups
goggly eyes
black sharpie
large mixing bowl
wisk

Here's what you do…
1. Make the pudding according to the directions on the box (pour contents of box into a bowl, add 2 cups of milk, and stir)
2. Add 3-4 drops of green food coloring
3. Add goggly eyes and draw a face on the clear plastic cups.
4. Add the green pudding to the plastic cups.
5. Add sprinkles on top for hair!
6. Eat!
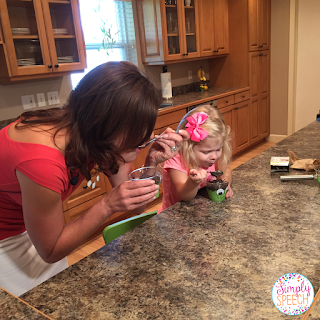
These pudding cups are so fun to make… and even more fun to eat! Kenzie and I had so much fun making them, talking about what ingredients we needed, and what steps come next. This activity was featured on this weeks' segment of Gayle's Guide to Pinterest. You can check out the video on my Facebook page. Have a great weekend!

Pumpkin Fun!

Friday, October 16, 2015
This post contain Amazon Affiliate links for your convenience. 
Last week we took the kids to the pumpkin patch. It's always fun to run around the pumpkin patch, take some adorable pictures, and bring home the perfect pumpkin (or 3!) I don't know about you, but I do not like carving a pumpkin. I know, it's weird, but I hate how they get gooey and rotten so quick after you cut into them. Plus, I have never been good at carving a picture on the pumpkin. However, since Kenzie is 3 now, I didn't want her to miss out on any of the traditional Halloween fun. I was just going to let her get creative and paint her pumpkin this year until I was at Target came across these adorable character pumpkin push-ins!
There were many different characters available (Elsa, Olaf, Mickey, Spider Man, Ninja Turtles, etc) but we are big Minnie Mouse fans over here, so thats what we went with. This was an adorable (and much less messy) alternative to carving the pumpkin! Plus it turned out SO cute!!
My favorite part of this experience is that without Kenzie even knowing it, I turned it into a language activity. We followed directions, practiced sequencing skills, used descriptive words, and requested up a storm! I couldn't help but think how this would make such a great therapy activity. Many parents don't realize how easy it is to work on speech and language skills with their children at home. You don't need fancy therapy materials, you just need to spend time and talk with your child! Have a wonderful weekend :)

In My APPinion: Main Street Memory

Wednesday, October 14, 2015
Appy Wednesday! I hope you all are having a great week. If you have students on your caseload working on memory skills, I have an app for you! Virtual Speech Center created an app called, Main Street Memory that was created to help both children and adults with processing and recalling auditory instructions.
I was provided a copy of this app in return for a review, however, all opinions expressed in this review are my own.
 When you first open the app, you will see the main screen that is pictured above. From this screen, you can adjust settings, learn information about the app, view student reports, or get started. When you click START, you will see the screen below.
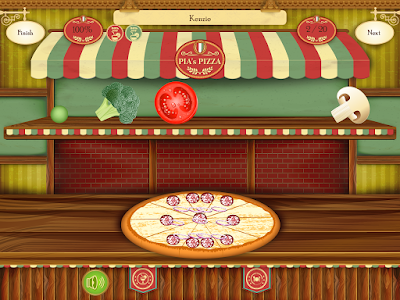
 This screen will allow you to choose which students you will be working with as well as what theme/location you want the app to use. You can choose from Jin's Jewels, Pia's Pizza, and the Sweet Shop. After you choose from those settings, you are able to choose specific type of directions you want. For example, in the pizza shop you can choose if you want one, two, or three topping orders or if you're in the sweet shop you can choose how many items and how many modifiers you want to target.
 Below if a screen shot from Jin's Jewels. The student is prompted with a direction or order from a customer. For example, "I'll take a red, a blue, and a yellow bead, please." If your student needs to hear the instructions again, he/she can tap the green speaker button at the bottom of the screen.
 Below is a screen shot from Pia's Pizza. The student is prompted with a pizza order such as, "I'll take a pepperoni and onion pizza!"
 Below is a screen shot from the Sweet Shop. Your student may be prompted with a customer's order such as, "Green gummy bear and pink taffy for me, please."
 After the student completed the tasks, they are able to play a "pac-man" style game as a reward.
 This app stores student data and allows you to email it which is always helpful with parent and teacher communication. Virtual Speech Center did a great job with this app. The themes are engaging to students, even my 3 year old enjoyed playing with this app. I really like that you can use this app with multiple students at once. One feature I really like about this app is that it has a background noise option. You can choose from people talking, birds chirping, or static noise. This is a great feature to use when working with auditory/verbal students. This app is great for young children, but I could see how the directions may be simple for older students and adults, depending on their individual level. Overall, I would recommend this app for students working on memory recall and following directions.
You can learn more about this app and download a copy in the iTunes store, here!


Pin of the Week: DIY Dry Erase Boards

Friday, October 9, 2015
Ahhh, happy Friday! Life is crazy these days. Weeks fly by and I feel like I can barely keep up with what day it is. I love to be organized but sometimes it's hard. Real hard. Lately, the best way for me to stay organized and not forget things, is to keep lists. Between to-do lists, grocery lists, and reminders, I have pieces of paper all over my house. I needed a better way. So of course, I turned to Pinterest for some inspiration. I found these super simple and very cute "do it yourself" dry erase boards!
 Here is what you need:
- A picture frame Any size will work… pick one that will fit your needs the best.
- Scrapbook paper You can find some pretty colors or patterns that will match your decor! I found some cute paper that looked like handwriting paper from school that I thought would be perfect for to-do lists!
- Dry erase markers
- Magnets These are optional but work really well on the back of the frame if you want to stick it to your fridge. Just make sure you buy strong, large magnets if you do this.
Here is what you do:
1. Take the back off the frame.
2. Remove the paper/sample photos from the inside of the frame.
3. Insert your scrapbook paper. You may have to trim it down depending on the size of the frame.
4. Put the back of the frame back on and BOOM you have a dry erase board!

Told you it was simple. If you look on Pinterest, there are so many different ideas and options for creating a unique board. Some other ideas I liked was using burlap instead of scrapbook paper or even paint chips for a very colorful effect.
The two pictured above are the ones I use at home. The black frame I keep by my desk. It's usually filled with to-do's and reminders. The smaller white frame I keep in the kitchen for meal planning. I found the Menu template here.  I loved this idea so much that I used it for my 3rd segment on Gayle's Guide to Pinterest! You can view the segment below :) Have a great weekend!

Teaching Pronouns

Thursday, October 8, 2015
This post contains Amazon Affiliate links for your convenience. 
Little ones seem to mix up pronouns pretty frequently. It's very common to have pronoun goals on my students' plan of care when they are young. With my daughter, everyone was a "she." It's something we worked on on a regular basis. Luckily with her, I was able to correct her he's, she's, and him's enough times that it finally stuck. But for some kids they need a little more. I often have parents ask me how they can work on using pronouns properly with their kids because they just aren't "getting it."
My answer: visuals. I love using visuals, manipulatives, and anything they can put their little hands on to understand the difference between a him and a her.
Before you can jump into working on pronouns, you need to make sure your child understands the difference between boys and girls. This seems like such a simple concept, but for some it's not. One of the easiest ways you can do this is by rounding up a bunch of dolls and action figures… whatever is in your toy box. (If you don't have any of these, use photos or cut out pictures of people from magazines) My daughter is obsessed with the Magic Clip Disney Princess dolls so I always have those handy. Have your child sort them into two piles, one for boys and one for girls. Once they have mastered sorting them, I like to use a sentence strip and have them produce the sentence, "____ is a girl" or "_____ is a boy." This works great with family photos!
Once you know they have mastered the boys vs. girls concept, you can introduce pronoun usage. One of my favorite toys to use with this is Mr. & Mrs. Potato Head 
Pull out two potato bodies and decide which one with be the boy and which one will be the girl. Take turns giving directions for dressing the spuds. For example, "He wants the blue hat." "She wants pink lips." or "Give the mustache to him." You can also use picture cards and have your child give them to him or her. Everyone loves the potato family so it's a fun way to work on this skill!
Once your child has mastered pronouns receptively, it's time to move on to expressive pronouns. This skill can be worked on with picture cards, toys, books, apps… anything with a picture of a person. Have your child describe what the person is doing in the picture, "He is playing in the park." "She is shopping." I like to use verb or emotion flash card apps with this skill.
There are so many ways to target pronouns, why not make it fun?!

Check out my Teacher Pay Teachers store here for tons of pronoun activities!

Pin of the Week: Crockpot Cheeseburgers!

Friday, October 2, 2015
Who is a fan of quick and easy dinners? When I am cruising Pinterest for a new dinner idea, I usually put the word "easy" into the search box. Of course it goes without saying that it has to be yummy, too! A few months ago I can across this pin for Crockpot Cheeseburgers. The first time I made them was for one of our weekly Sunday-Funday Family dinners. We were hosting that week and I had just come across the pin a few days before, so I thought I would use my family as Guinea pigs. They were super easy, amazingly delicious, and had everyone asking me for the recipe before they left. 
According to the original recipe by Mostly Homemade Mom, here's what you need:
  • 2 lbs ground beef
  • 1 medium onion
  • 3 cloves garlic, minced
  • 2 tablespoons yellow mustard
  • 6-8 Vlasic Farmer's Garden Zesty Garlic Chips, chopped
  • 8 oz Velveeta cheese
  •  rolls and burger toppings

Here's what you do:
1. Brown the ground beef and drain it.
2. Transfer the ground beef to the crockpot. (The first thing I always do when using the crockpot is put in a crockpot liner. You can buy them at the grocery store and it seriously saves you major scrubbing time later!)
3. Add the onion, garlic, mustard and pickles. I personally don't add the pickles to the crockpot, I just put them out as a topping for the burgers once they are ready to be served. 
4. Cook on low for 2 hours! It comes out like a melty, cheesy sloppy joe!
These are so good! I promise you, you will be glad you tried these. We don't have a grill at our  house yet so this is my solution to still having a burger every once in a while. I loved this recipe so much that I chose to feature it on my second segment of Gayle's Guide to Pinterest! You can check out the video below!
Happy Pinning!


Powered by Blogger.