Halloween in the Speech Room!

Wednesday, October 31, 2012
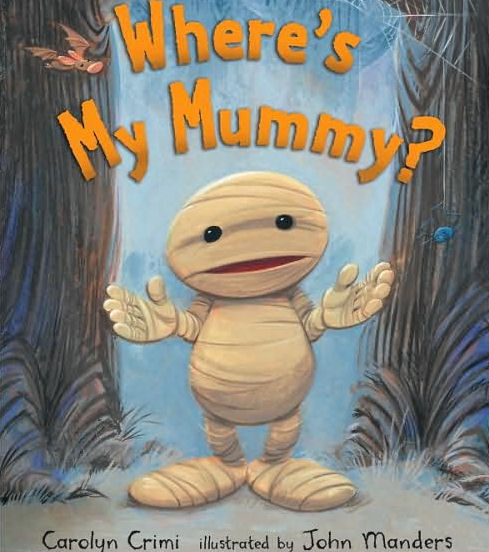
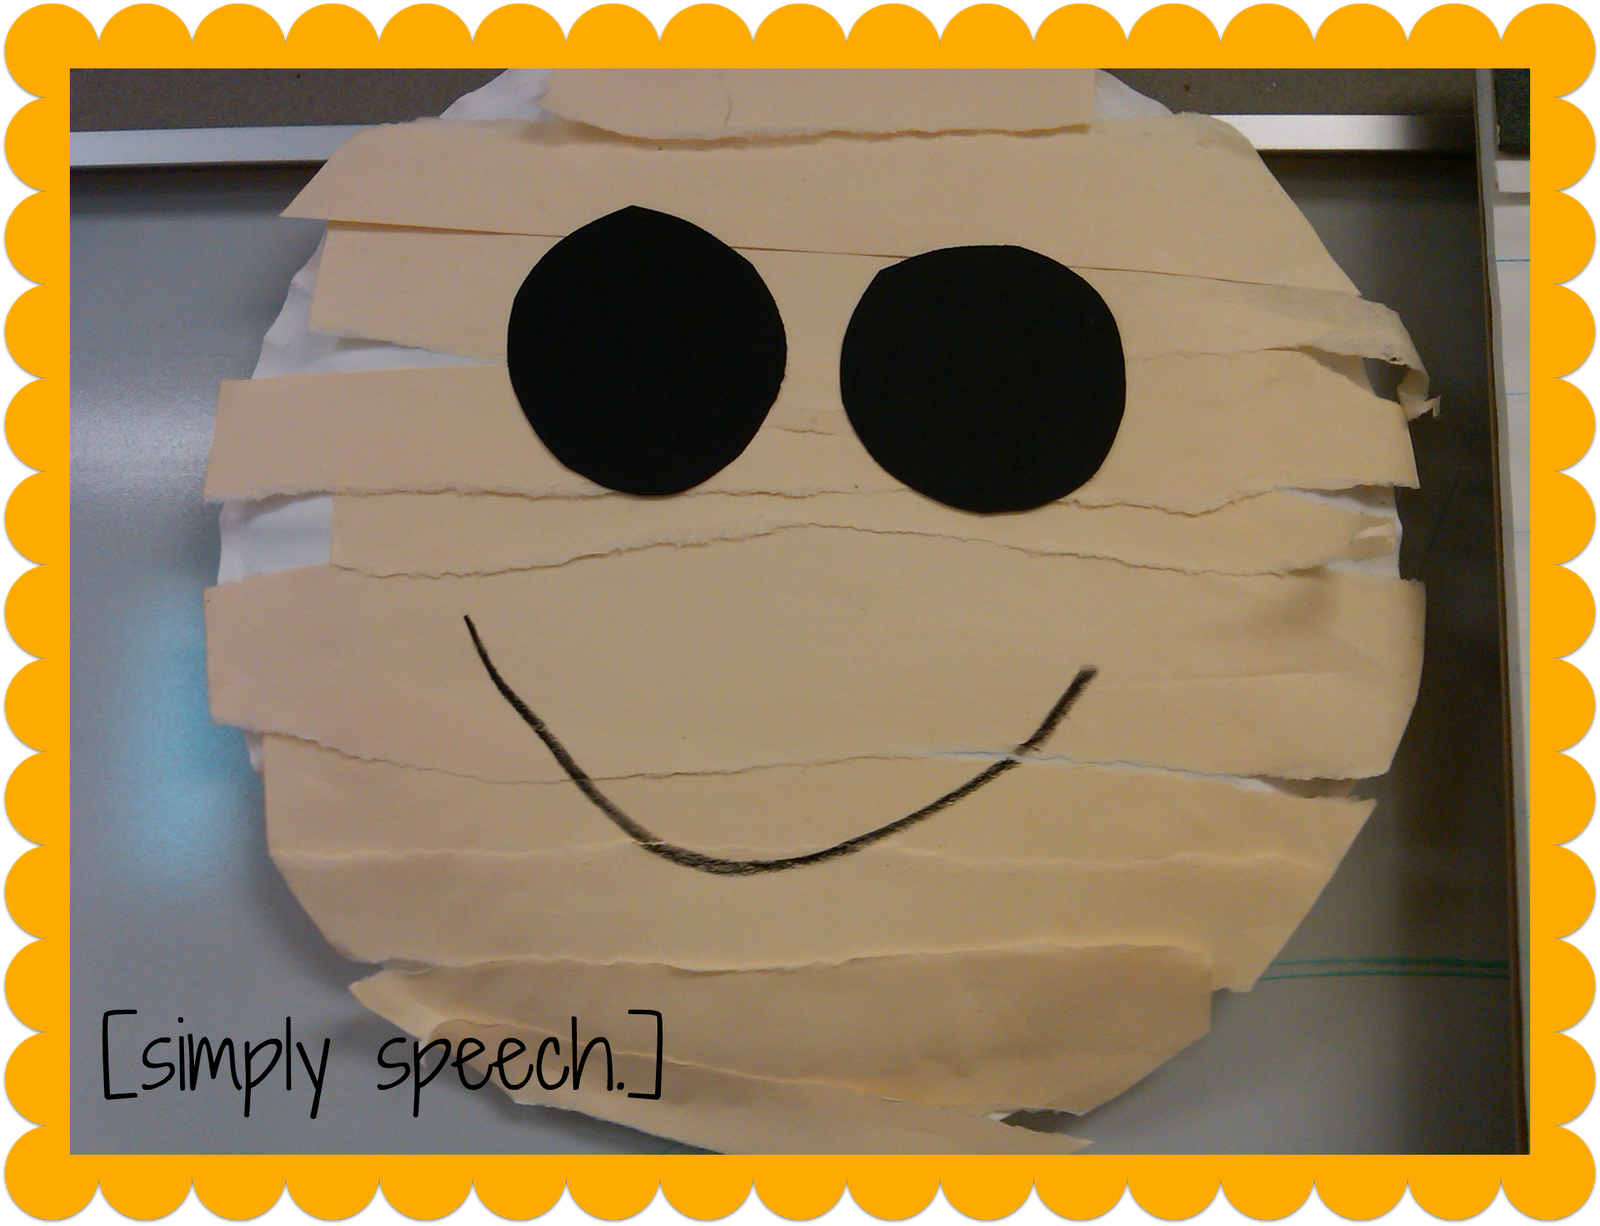
Happy Halloween from my speech room to yours. We have been doing festive activities for the last few weeks so of course,  this week was no exception.
This week, Spookley visited my PreK and Kindergarten speech and language groups. Let me tell you, he gave the Big Green Monster a run for his money! The kids had a great time learning about Spookley and why it is important that we are all different and special. I downloaded the Spookley story app for $1.99 and used the iPad to tell the story to the kids (much more exciting than me!) This story is great for targeting shapes and colors, comprehension, and social skills.
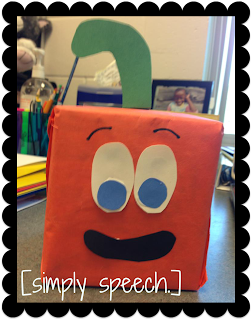
I created my own Spookley out of an empty cube tissue box!

After we read the story, I let the students choose what shape pumpkin they would like to be: square, circle, triangle, or rectangle. They were then able to decorate their pumpkins however they wanted to. I asked them, "If you were a pumpkin, what would you like to look like?" They had a lot of fun with this! I also attached a little note about Spookley and why the pumpkins were all different shapes and colors (so mom and dad didn't think I was crazy!)

The Legend of Spookley the Square Pumpkin!
Spookley is a very special pumpkin we met this week. He was not round like the other pumpkins, he was a square. Spookley taught us how important it is to be different and special! If I was a pumpkin, I would be
________________________________________!

I also wanted to share one other activity that turned out really well. I let one of my students write on chart paper (motivation to actually write!) and we wrote a poem together.

Have a very Happy Halloween!! What did you do today?

Halloween Silly Story Starters- Freebie!

Monday, October 29, 2012
I know a lot of us are working on story grammar with our students. I came up with a fun activity that targets characters, setting, and kick off. The activity has a page with a column of WHO's (characters) WHAT's (kick off's) and WHERE's (settings) that you cut out and separate into piles or cups. The students are allowed to be creative with the rest of their story as long as they include the character, setting, and kick off on their slips of paper!

To play:
Print out the second page and cut out each box.
Use 3 cups to separate the who, what, and where. Use the first row to label each cup.
Let each student choose one piece of paper from each cup. Then, they write a story using their silly story starter!
For example:
A mummy got lost at the mall.

To download this activity, click here: Halloween Story Starters! If you download this activity, please leave me a comment letting me know you grabbed it. Trust me, those comments make my day! :)


Go Away Big Green Monster!

Friday, October 26, 2012
I want the Big Green Monster to come visit my classes every year! He is so cute and I am so sad I have just learned about him this year! I actually found him by accident. I saw a Facebook post about the story app for free one day so I downloaded it. Then I found out how popular he was on Pinterest! I wanted to share with you what we have done in speech this week with the BGM!

With all groups, I used the story app to read the story aloud. With the app you have the choice to read by yourself, have the author read to you, have a child read to you, or listen to the story song (my favorite.... seriously I have been waking up singing the song all week!) The activity I did with each group depended on the grade, ability level, and goals.
 With PreK I did a following directions activity. Each student got a paper plate and monster face pieces. I then gave them instructions such as, "Find a yellow crayons and color his big eyes." After we finished the activity, we listened to the story again to make sure we made our monsters correctly!

With my kindergarten students, I did a similar activity. I also included words to make the sentence: "The Big Green Monster." The students created their monster as they listened to the story. KizClub
I found the monster face pieces here: 

My older students created a glyph based on information about themselves. 


Halloween Comprehension Freebie!

Wednesday, October 24, 2012
Well today I actually got some time to do some blogging... 2 posts in one day! I am currently sitting in Starbucks writing this post. Grandma is watching the munchkin so I thought I would get caught up on some goodies. Today I posted a picture on my Facebook page showing the game board I used in speech from Crazy Speech World. So I thought I'd share the game I made that works just perfect with it!

The game is a collection of 8 Halloween short stories with comprehension questions to go with each one. I have quite a few kiddos this year that need comprehension skills, so this is what I came up with to target that skill while still being festive. 
To download the game click here: Trick or Treat!

I incorporated it with Jen's game board by having the student put a chip on a piece of candy each time they answered a question correctly. To download Jen's game board click here!

If you download a copy of my game please leave me a comment letting me know! The more downloads I get, the more motivated I am to make more freebies!

Homework Folders... This Is How We Do It!

If you have Montell Jordan in your head now, we are totally on the same page :) Earlier in the school year I had a lot of questions about how I do homework folders. I decided to re-do my method this year and sent them home for the first time this week. This method is pretty simple and will (hopefully!) increase the amount of practice my students get at home.
 Each student has a their own folder. Each folder contains a letter from me, a calendar, and their homework for the week.
The letter explains what is expected from the homework folder. Here's the run down:
-homework is given once a week
-folders stay at home all week and are returned when the calendar says to bring it back
-parents initial in each date that their child practices (alone or with a friend/ family member/ pet( yes, they can read their words to their gerbil!), etc
-if the parent initials at least 3 times during the week, the student gets a treat!

I also include the date and time that the students receive speech services. This way the parents are aware of what time they are with me and can schedule appointments around speech time (wishful thinking, I know!)
I have a blank calendar that I write in for each month. I make notes such as:
"take folder home today"
"bring folder to speech today"
"IEP meeting at 2:00"
etc.... this is a great communication tool with parents!

So that's it! Short, simple, and sweet... Let me know your thoughts!

LessonPix Review and Giveaway!

Tuesday, October 23, 2012
Have you heard of LessonPix? I first learned about this program while I was at an Autism training over the summer. Bill and Lori Binko, creators of LessonPix, were doing a demonstration of the program when it caught my eye. LessonPix is comparable to Boardmaker. (But in my opinion, if Boardmaker and LessonPix got into a fight, LessonPix will totally kick butt!) There is so much you can do with this program and there are so many more picture options.

Here is a little background on LessonPix:
Lori Binko is a mother of four and a National Board Certified teacher in Special Education. Currently, she teaches an inclusion Pre-K class in a public school. Bill Binko leads cutting-edge development efforts and solving unique and difficult problems for companies of all sizes.  After 18 years in corporate IT and consulting, he's thrilled to bring his technical expertise, development abilities and non-traditional thinking to bear on much more rewarding challenges.  He is always looking for ways to bring solutions to the early childhood, SLP, and ASD communities. Together, they have created LessonPix for the people who support and who love special learners. The goal was an easy online tool to create specific, customized materials for parents, teachers and therapists. The result is LessonPix ‐ a powerful set of tools. As the parents of a special needs child, their professional lives and talents lent to making this online set of tools to create learning materials, schedules and visual supports for the home, the classroom … anywhere.


LessonPix allows you to quickly and easily make custom materials to use in your classroom, therapy sessions, at home, etc. After you choose your pictures, you are given options for what to create with them. Here are just some of the examples:

  • Bingo Cards
  • I Have, Who Has game
  • Lacing Cards
  • Pattern Strips
  • Picture Cards for communication
  • Treasure Maps
  • Calendar Cards
  • Custom Dice
  • Writing Pages
  • Weekly Tracking Chart
  • Sorting Mats
  • etc......
I was so impressed with this program that I contacted Bill about doing a product review and giveaway! I now use LessonPix all the time! Below are some examples of projects I have created using LessonPix:
Social story cue cards to keep at the student's seat. 

First/Then visual schedule

Story sequencing cards to go with There Was an Old Lady Who Swallowed a Bat!

Treasure Map for a following directions activity during Pirate Week!

An online membership to LessonPix costs $36 a year, which comes to $3 a month.  Discounts are offered for buying memberships in bulk (school systems, etc). Enter below to win a 1 year subscription to LessonPix! (I wish I could enter!!)


Speech Cards App Review & Giveaway!

Friday, October 19, 2012
Happy Friday! I was recently contacted to review an app called Speech Cards by RWH Technology. After playing around with it for a few weeks, I have come to realize that this app is a must have! If you don't like to spend a lot of money on apps but enjoy using the iPad in therapy, this one is perfect. This is a customizable flash card app that can be used 100 different ways.

The original download of the app includes 4 pre-made decks: animals, food, initial p, and CVC words. This app also gives you the option to create your own decks. This is where the creativity kicks in. Tired of carrying around your card decks for artic practice? Take pictures of the cards and create your own deck in the app!
It is very easy to create your own deck. Go to customize then Add Deck.
You can name your deck by the category of pictures you will include. One idea I came up with was using the student's name as the deck name and including pictures of words that target all of their goals. 
After you name the deck, you can add pictures. Take pictures of objects first, then upload and name them. Of course, I added Kenzie into my /k/ words deck!

Some other useful features of this app include:
Create up to 24 decks
Email cards as PDF
Share decks with other Speech Card users
Data tracker included for up to 12 students
Email student reports
You and students can record your voice to go with pictures (my students think this is the coolest thing!)

Here are some other ideas to use with this app:
articulation decks
vocabulary 
sight words
social stories
categories
communication book
etc....... 

Speech Cards sells for $4.99 in the iTunes store.... or you can try to win a copy below!


Have You Been BOOed?

Monday, October 15, 2012
Usually being BOOed is not a good thing... but around Halloween, it's a great thing! At school this year, we have been "Boo-ing" each other to get in the spirit. BOOing is kind of like Secret Santa for Halloween. 

Here is how it works:
1. Get 2 small Halloween gifts (bag of candy works perfect)
2. Secretly give the gifts to 2 co-worker (we have been putting them in staff mailboxes.)
3. Attach the You've Been BOOed! note with the gift so they know to pass it on!


It is so much fun and really gets everyone in the spirit!

Language Builder App Review & Giveaway!

Saturday, October 13, 2012
I am back with another fabulous app review and giveaway from The Mobile Education Store! Language Builder is a great app to use with students trying to improve their receptive and expressive language skills. One great thing about this app is that it can be customized for each student and his/her needs. There is also an option to choose what type of pictures to display. Some examples are: inside playtime, places, pets, sports, school, hobbies, medical, etc. If you are working on a certain theme in therapy, you may be able to choose pictures that match your thematic unit. Below is a screen shot of the settings page.

After you have selected your settings, level, and theme, you are ready to Play! Once you hit play, you are presented with a picture and prompted (if you choose the audio instructions to be ON), "Make a sentence about the picture."

If your student is having difficulty creating a sentence independently, they can tap the Hint button. Depending on what level you selected on the setting page will determine what type of hint the student will get. With a Level 1 hint, a sentence is shown with missing words for the student to fill in. A picture of a Level 1 hint is below:

In Level 2, the hint is the beginning a possible sentence for the student to complete. Below is a picture of  Level 2 hint:

In Level 3, there are no words displayed for the student, but an audio hint is given. After each picture, the student is given an option to record the sentence (articulation during language therapy!!)

Language Builder is great because you really could do some much with this app. As I just mentioned, targeting articulation goals with this app is possible. You could also have the students tell or write a story (written language goals) about the picture, rather than just providing a sentence. The students' recorded responses are saved in an archive. Using the archive is a great progress monitoring tool (how detailed was the sentence in August compared to October? How accurate was the articulation of the sentence last month?)

You can purchase Language Builder in the iTunes store for $9.99 or try to win a copy below!


a Rafflecopter giveaway


Where's My Mummy?

Friday, October 12, 2012
I love, love, love the story, Where's My Mummy? by Carolyn Crimi. This is an adorable, not so scary, story of little baby mummy that does not want to go to bed. Instead, he plays "hide and shriek" and runs into some  Halloween creatures along the way.
There are so many fabulous activities you can do with this story. Here are some ideas of goals you can work on with this book:

  • comprehension
  • vocabulary
  • sequencing
  • story predicting
  • articulation (read along or fill in the story blanks)
  • story retell
  • categories (things you see on Halloween)
Here is an activity I did with my students. After we read the story out loud, we did a shared writing activity on chart paper. We titled the paper "When I'm Scared, My Mummy...." and each students answered what their "mummy" (mommy) does to make them feel better when they are scared. Some of the answers you get will be pretty funny! One of my students told me that when he is scared, his mom gives him a dollar! Here is a picture of our display!


After the read aloud, each student created their own baby mummy. To make the mummy, I gave each child a paper plate. Then, they shredded some paper and glued the paper to the plate.  I pre-cut black eyes for them and they drew on a smiley face or scared face. Last year I used googly eyes. To check out my similar activity from last year, click here. Here is an up close example of our baby mummy!


This book is always such a hit! 

Door Decorations!

Thursday, October 11, 2012
Are you in the Halloween spirit yet? At my school, all of us in the ESE pod decorated our doors this week. I found some cute ideas on Pinterest (are you surprised?) and decided to decorate my door like a pumpkin. That started a domino effect! Check out the photos of our hallway!

Spooky Speech Room :)
The Reading/ Math Coach's office and OT office

VE Resource Room

\
Blended PreK 3 & 4 year old class.... and janitor's closet!

 Please share your Halloween decorations with me on my Facebook page!


I {heart} May Books!

Friday, October 5, 2012
Have you checked out May Books website yet? This company creates the cutest personalized notebooks and planners I have ever seen. I first found out about them on Pinterest. As an SLP (and slightly OCD person!) notebooks and planners are essentials.

Here is the short version of the birth of May Books:
Logo designer, Mica May, was always a notebook junkie - but couldn't find the PERFECT one. On a whim, she began designing them for herself, with patterns + insides she wanted. Clients & friends wanted them too, so she threw some patterns up online and May Books was born nearly overnight.


To get your own May Book, go to their wesbite: www.maybooks.com and select "shop." The first step is to choose your pattern. May Books has almost 200 different colorful, trendy patterns to choose from. College readers- there are even sorority designs.... I came so close to ordering an ADPi notebook, too! 
Warning: it is extremely hard to choose which pattern to use!
After you choose your pattern, you can customize your book. Choose a monogram/ name style, background for it, and color. After that, choose what type of planner or notebook you want and boom... you have your May Book! How easy it that?


This is a shot of my therapy table... iced coffee, planner, and my May Book notebook! I am really big on the chevron pattern this year :)

Now that you are super psyched about ordering a May Book, I have some exciting news... some lucky duck will win free May Book! You must do 2 things to enter:

1. Put a link to May Books on your Facebook Page: www.maybooks.com
2. Leave a comment telling me your favorite May Book pattern!

That's it! A winner will be chosen at random on Monday October 8, 2012
 

Spice Up Your Artic Sessions!

Wednesday, October 3, 2012
We all have fallen victim to the dull articulation sessions. I am sure I am not alone with the, "Candy Land again?" or the, "We just played Go Fish!" Sometimes it just takes a few fresh ideas to get our kids motivated again. Here are some fun, thinking out of the box ideas to spice up artic therapy!

1. A Treasure Hunt! Have your kids go on a treasure hunt (in the therapy room or around the school) for items that contain their sound. Write them down then practice them as they read their list to the group.

2. Play "I Spy" or the "Going on a Picnic/ to Grandma's House" game where students have to list items that have their sounds in them.

3. Magazine Hunt. Save those Sunday ads and have your kids make a collage of words they find with their target sound in them.

4. Listening game. Read a list of words where some contain a target and some don't. When they hear their sound they have to jump up or do something silly. Have the kids take turn reading the list of words.

5. Play Catch. Every time the ball/ beanbag is thrown, the person catching has to say a word that has the target sound in it.

6. Make a book. Create a book full of pictures, drawings, magazine cut outs that have the target sound in them. Create a sentence for each picture in the book.

7. Jenga! Tape target words onto Jenga pieces. As they take a piece, they have to say the word or make a sentence for the word.

8. Create a road out of artic cards. As the child drives the car over the cards, he/she says the word.

9. Hopscotch! Create a hopscotch game. Put an artic card in each box. As they hop in the box, they read the word.

10. Tic Tac Toe. Create a tic tac toe game board with artic words on it. As students make their X's or O's, they say the word in the box.

I hope you find this helpful... what are your favorite artic games?
Powered by Blogger.